Featured

Dents & Dings – Discounted Model Kits & Hobby Items with Box Damage
$8.06 $11.00 ~ $40.00
One Piece Grand Ship Collection Baratie
$22.00 $16.50
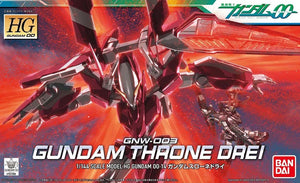
HG 1/144 HG00 GNW-003 Gundam Throne Drei
$21.00 $14.70
SD Gundam Ex-Standard Try Burning Gundam
$11.00 $9.35
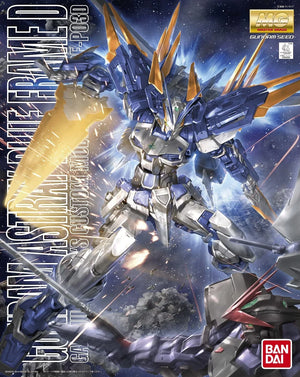
MG 1/100 MBF-P03D Gundam Astray Blue Frame D
$59.00 $42.48Beginner’s Guide to Nubs: What They Are and How to Deal With Them
If you're new to scale modeling or Gunpla, you’ve likely heard the term nubs thrown around. But what exactly are nubs, and why do so many hobbyists spend time getting rid of them? In this article, we’ll cover the basics of nubs, why they matter, and how to handle them to make your models look their best.
What Are Nubs?
Nubs are small, leftover bits of plastic that remain attached to your model parts after you cut them off the sprue (the plastic frame holding the parts). They’re a byproduct of the injection molding process used to produce scale model kits.
While nubs might seem like a minor annoyance, they can stand out on a finished model. Left untreated, they may affect the look, feel, and even the structural integrity of your build.
Why Remove Nubs?
Nubs might seem like a small issue, especially when you’re just starting out, but addressing them is a fundamental step in scale modeling for several reasons. Here’s a deeper dive into why removing nubs is worth your time and effort:
1. Improved Aesthetics
Nubs can distract from the overall look of your build, especially on highly visible or smooth surfaces. Here’s how they can detract from your model's appearance:
Visible Blemishes: Nubs often stick out as small bumps or rough spots on otherwise clean, flat surfaces. If left untreated, they can be glaringly obvious in the final build, especially under strong light or in photos.
Color Variations: Cutting too close to the part without proper finishing can leave stress marks - white or discolored streaks that ruin the uniformity of the plastic color. These marks are especially noticeable on dark or glossy parts.
Professional Finish: Even beginners want their models to look polished and detailed. Proper nub removal ensures a clean, smooth appearance that resembles a high-quality factory finish.
2. Better Fit and Functionality
Nubs can interfere with how parts fit together, which can create alignment issues or weaken the structural integrity of your model. For example:
Misaligned Parts: Nubs on connecting surfaces may cause parts to sit unevenly, leading to visible gaps or misalignments.
Assembly Frustration: Nubs can make snapping parts together harder, especially in tight-fitting areas like joints or pegs.
Strength and Durability: Removing nubs ensures parts are securely joined without stress on the plastic, reducing the risk of breakage over time.
3. Essential for Painting
If you plan to paint your model, proper nub removal is critical to achieving a flawless finish:
Smooth Surface Prep: Paint highlights imperfections like nubs or scratches. If nubs are left untouched, they’ll stand out even more once the paint is applied.
Improved Adhesion: Paint adheres better to clean, even surfaces. Nubs can cause uneven application, making paint prone to chipping or peeling.
Polished Results: For custom-painted models, smooth surfaces allow for a professional-grade finish that enhances the overall aesthetic.
4. Elevates Your Skills
Learning to remove nubs effectively is part of mastering the craft of scale modeling. Here’s how it helps you grow:
Attention to Detail: Removing nubs trains your eye to spot imperfections and encourages a focus on fine details, a skill essential for advanced techniques like panel lining, weathering, and custom modifications.
Build Satisfaction: A clean, nub-free model is incredibly rewarding. Knowing you took the extra step to refine your build makes the final product feel more like a work of art.
Foundation for Advanced Techniques: Nub removal lays the groundwork for more complex modeling skills. A smooth, clean surface is crucial for achieving effects like decals, topcoats, or intricate detailing.
Tools You’ll Need
To remove nubs, you’ll need a few basic tools. Here’s a beginner-friendly list:
Side Cutters/Nippers:
A reliable pair of side cutters is a beginner's best friend for cutting parts off the sprue. While any basic side cutters will do the job when you're starting out, investing in a high-quality hobby nipper, such as the GodHand Ultimate Nipper, can make a significant difference. These precision tools provide clean cuts with minimal stress on the plastic, reducing the amount of nub material left to clean up. If your budget allows, they’re well worth the upgrade.
Hobby Knife:
A sharp hobby knife is indispensable for trimming down leftover nub material after cutting. Always ensure the blade is fresh and sharp to achieve precise cuts and avoid tearing or gouging the plastic. Safety is paramount—always cut away from your fingers and use steady, controlled movements to minimize the risk of injury. A cutting mat can also help protect your work surface while providing stability.
Sanding Sticks/Paper
After trimming, sanding is crucial to achieve a smooth, polished surface. For beginners, a set of sanding tools with varying grits is essential:
- Start with #600 or #800 grit to remove rough edges.
- Progress to finer grits like #1000 or #1500 for a smooth finish.
- Add a polishing block or sponge to restore the part’s original shine and blend it seamlessly with the surrounding plastic.
Investing in quality sanding supplies will make the process easier and produce cleaner results, especially if you plan to paint your model later
How to Remove Nubs: Step-by-Step
Cut the Part from the Sprue: Use a pair of nipper to snip the part away from the sprue. Leave a small amount of nub material to avoid stress marks.
Trim with a Hobby Knife: Carefully slice away excess nub material, working gradually to avoid gouging the part.
Sand the Area: Start with a coarser grit sanding stick (e.g., 400–600 grit) and work your way to a finer grit (e.g., 1000–1500 grit) for a smooth finish.
Polish (Optional): For a professional touch, use a polishing compound or a polishing block to restore the part’s original shine.
Pro Tips for Beginners
Work Slowly: Patience is key when removing nubs. Rushing can lead to scratches or damage.
Avoid Stress Marks: Cutting too close to the part right away can leave stress marks. Always leave a little extra and trim it down.
Practice on Spare Parts: If you’re unsure, practice on leftover sprue pieces or less-visible parts of your kit.
----------------
Dealing with nubs is an essential skill for any Gunpla or Scale Model builders. While it might take some time to master, removing nubs will significantly improve the quality of your builds. With the right tools and techniques, you’ll soon be creating clean, professional-looking models.
Happy building! If you found this guide helpful, share your first nub-free build with us on our Instagram (https://www.instagram.com/lascalemodel/) We’d love to see your progress! 🚀
