
Featured

Dents & Dings – Discounted Model Kits & Hobby Items with Box Damage
$56.00 $50.00 ~ $120.00
Bandai HGGQ #12 1/144 RX-78-02 White Gundam Model Kit
$18.20 $15.47
Endless Create SR-01 Shurado Series Byaki MGSD-Style Model Kit
$50.00 $35.00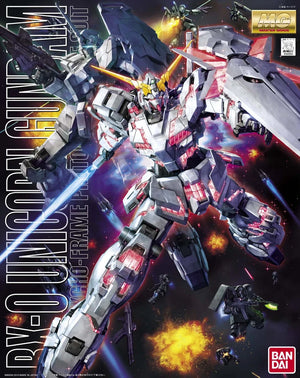
Bandai MG #131 1/100 RX-0 Unicorn Gundam (OVA Ver.) Model Kit
$67.00 $54.27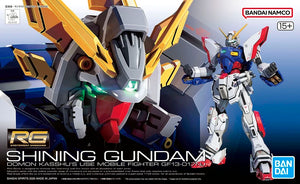
Bandai RG #42 1/144 GF13-017NJ Shining Gundam Model Kit
$43.00 $36.55Gunpla Top Coat Guide: What They Are, How to Use Them, and Which Finish to Pick

Originally published December 2023. Updated March 2026.
You just spent hours building, nub-cleaning, and panel lining a kit. It looks good - but it still has that telltale toy-like sheen that screams "I am a $15 plastic toy." The colors look a little flat and plasticky. Your panel lines are crisp, but one careless brush of a sleeve could smear them right off.
A gunpla top coat changes all of that. It's a clear protective layer that seals your panel lines and decals, transforms the surface finish from "toy" to "realistic mecha," and ties the whole build together into one cohesive look. And while this guide uses Gunpla as the primary example, everything here applies equally to third-party mecha kits, garage kits, and plamo in general. If you've never used one, this guide covers everything you need to know - what top coats do, which finish to pick, how to apply them properly, and how to troubleshoot when things go sideways.
What Is a Top Coat?
A top coat is a transparent coating sprayed over a finished model to protect the surface and change how it looks. Think of it like clear coat on a car - it doesn't add color, but it dramatically changes the final appearance and durability.
Top coats come in spray cans (the most popular option for Gunpla builders), airbrush-ready bottles, and brush-on formulas. Spray cans are the go-to for most hobbyists because they're easy to use and produce an even finish without requiring expensive equipment. Airbrush application gives you more control but adds complexity and cost.
Why You Should Top Coat
Not every builder top coats their kits, and that's fine. But here's why most experienced builders consider it an essential step:
It kills the plastic look. Bare plastic has a specific sheen to it that reads as "toy" no matter how clean your build is. A matte top coat eliminates that instantly. It's the single easiest way to make a kit look like a realistic mecha instead of something off a store shelf.
It protects your work over time. Without a top coat, paint can fade, decals yellow or peel at the edges, and stickers develop visible white borders and discoloration. A top coat seals everything in place and slows down that aging process significantly. If you're building kits to display long-term, this is the step that keeps them looking the way you intended months and years down the line.
It can soften some surface imperfections. A matte coat diffuses light across the surface, which can make light sanding scratches and minor inconsistencies slightly less noticeable. Don't expect miracles here - it won't hide poorly cleaned nub marks or deep scratches, and it's no substitute for proper sanding. But it can take the edge off minor surface-level flaws.
It unifies the finish. If your kit has a mix of matte and glossy plastic, metallic stickers, and painted sections, everything looks a little mismatched. A single top coat layer ties it all together into one consistent finish.
Matte, Gloss, or Semi-Gloss - Which Finish Should You Pick?
This is the most common question beginners have, and the answer is simpler than you'd think.
Matte (Flat)
Matte top coat is the most popular finish in the Gunpla community by a wide margin, and for good reason. It removes all shine from the surface, giving the kit a flat, realistic appearance that looks like actual painted metal or composite material rather than molded plastic. It's also the most forgiving finish - it hides nub scars, light scratches, and surface imperfections better than any other option.
If you're not sure what to pick, pick matte. It makes almost every kit look better, and it's very hard to mess up.
Gloss
Gloss top coat gives your kit a shiny, reflective finish - think sports car or freshly waxed showroom model. It makes colors look more saturated and vibrant, and it's the right choice when you intentionally want that shine - especially on parts with metallic or chrome finishes where a glossy surface looks natural.
The catch? Gloss is unforgiving. Every scratch, dust particle, uneven surface, and visible decal edge gets amplified. If your surface prep isn't clean, a gloss coat will announce it to the world. It also tends to go on thicker than matte, which means you need to be more careful about over-application and potential fitting issues on tight-tolerance parts.
Gloss coat has one important practical use beyond aesthetics: applying a gloss layer before panel lining and waterslide decals gives you a smooth surface that helps liner flow into recesses and decals adhere cleanly. Then a final top coat in your chosen finish seals everything in place.
Semi-Gloss (Satin)
Semi-gloss splits the difference. It has a subtle sheen without being reflective - close to what factory-fresh unpainted plastic looks like, actually, which is why it can be hard to notice the difference on an unpainted kit. It's a solid choice if you want something between the flat realism of matte and the vibrancy of gloss, and it works particularly well on kits with lots of curved armor (like the Sinanju or Qubeley) where a subtle shine feels natural.
Solvent-Based vs. Water-Based Top Coats
The chemistry of top coats can get confusing fast, partly because terms like "lacquer" and "acrylic" are used loosely across different product lines. Most top coats on the hobby market fall into two broad camps:
Solvent-based (often called "lacquer"): This includes products like Mr. Super Clear and Tamiya's TS spray line. Tamiya officially calls theirs a "synthetic lacquer," and Mr. Hobby labels Mr. Color products as "solvent-based acrylic" - but the hobby community generally just calls all of these lacquer. They dry harder, produce a more durable finish, and are the standard choice for serious builds. The fumes are stronger than water-based options.
Water-based acrylic: This includes Mr. Hobby's Top Coat line (the one in the blue/red/green cap spray cans) and their newer Mr. Premium Top Coat line. These are gentler on plastic, lower odor, and easier cleanup. They're not quite as tough as solvent-based coats, but for most builders - especially beginners - they work great.
Both types still require proper ventilation and ideally a respirator when spraying. Water-based doesn't mean fume-free - you're still aerosolizing chemicals, and your lungs don't care what the label says.
Will Top Coat Melt My Paint?
This is one of the most common questions from new builders, and the short answer is: no, not if you do it right.
The concern comes from the fact that solvent-based top coats (like Mr. Super Clear or Tamiya TS sprays) use stronger solvents that can theoretically dissolve water-based acrylic paint underneath. And yes, that can happen - but only under specific conditions. If you spray too heavy, too close, or over paint that hasn't fully dried and cured, you can get lifting, wrinkling, or dissolving. That's less about the top coat and more about technique.
In practice, if you follow two rules, you'll be fine regardless of which top coat type you use over which paint type:
1. Make sure your paint is fully cured before top coating. "Dry to the touch" is not the same as cured. Acrylic paint can feel dry in 20 minutes but may need 24-48 hours to fully harden. Lacquer cures faster, but giving any paint at least overnight is a good habit. If you rush this step, even a water-based top coat can cause problems.
2. Apply light, even coats. Multiple thin passes are always safer than one heavy coat. A light mist of solvent-based top coat over cured acrylic paint will be absolutely fine. A heavy, wet coat of anything over anything is asking for trouble.
If you're still nervous, water-based top coat (like Mr. Top Coat) is the more forgiving option and a perfectly good place to start. But plenty of builders spray Mr. Super Clear over Tamiya acrylics every day without issue. Technique matters more than chemistry here.
How to Top Coat Your Gunpla (Step by Step)
Top coating is straightforward, but there are a few things that will make or break your results.
What You'll Need
- A spray can top coat (Mr. Hobby Top Coat or Tamiya Clear are the most popular choices)
- Bamboo skewers, alligator clips, and tape for holding parts
- A styrofoam block or cardboard box to stick your skewers into
- A well-ventilated area (outdoors is best, a spray booth works too)
- A respirator mask - not optional, even outdoors
Prep Work
Disassemble your kit into major sections - arms, legs, torso, head, weapons. You don't need to pull every individual piece apart, but separating into sections means you can reach all surfaces and avoid missing spots where armor panels overlap.
Attach each section to a skewer or alligator clip at a connection point that won't be visible (ball joint pegs, the inside of a thigh piece, etc.). Stick the skewers into a foam block so everything stands upright.
If there are areas you don't want coated - clear parts like camera eyes or beam saber blades, for example - mask them off with small pieces of masking tape.
Applying the Top Coat
1. Shake the can thoroughly. A full minute of shaking, minimum. You should hear the mixing ball rattling clearly. Inadequate shaking is one of the most common causes of uneven results.
2. Check the weather. This is not optional advice. High humidity is the enemy of spray top coats. Moisture in the air reacts with the spray as it dries and causes "frosting" - a white, hazy film on the surface that can ruin your finish. Aim for a dry day with humidity below 60%. If it's raining, wait.
3. Hold the can about 6-8 inches (15-20 cm) from the part. Too close and you'll get pooling, bubbles, or an uneven coat. Too far and the spray dries before it reaches the surface, leaving a rough, grainy texture.
4. Spray in short, even passes. Don't hold the nozzle down and hose a part. Quick left-to-right sweeps, about one second each, overlapping slightly with each pass. Think of it like painting a wall - even coverage, no spot getting hammered with product.
5. Apply thin coats and build up. Two or three light coats are always better than one heavy coat. Let each coat dry for 10-15 minutes before applying the next. You want to see a slight, even sheen of moisture on the surface after each pass. If it looks wet and drippy, you're going too heavy.
6. Let it cure. After your final coat, let the parts sit untouched for at least an hour - ideally overnight. The top coat may feel dry to the touch in 15 minutes, but it takes longer to fully harden.
Common Mistakes and How to Fix Them
Frosting (white haze): This happens when you spray in humid conditions or apply too thick a coat. If it's mild, you can sometimes fix it by re-spraying on a dry day - the fresh coat of solvent can re-dissolve the frosted layer. For worse cases, try a light spray of gloss coat over the frosted area. If nothing works, the top coat will need to be stripped and reapplied.
Orange peel texture: The surface looks bumpy like the skin of an orange. This usually means you sprayed too much product at once or the ambient temperature was too high, causing the coat to dry unevenly. Light wet-sanding with 1500+ grit sandpaper can smooth it out, followed by a fresh thin coat.
Grainy/Sandy texture: The spray was too far away, and the particles dried mid-air before reaching the model. Move closer on your next application. If the graininess is mild, another light coat at the correct distance can smooth things over.
Sticky or tacky surface that won't cure: Usually means the coat was too thick or the environment was too cold. Give it more time in a warm, dry area. If it's still tacky after 24 hours, you may need to strip and redo.
Top Coats and Panel Lining - The Order of Operations
This is where beginners most often get confused, so let's set the record straight.
The correct workflow is: Build → Paint (optional) → Gloss Coat → Panel Line → Apply Decals → Final Top Coat of your choice to seal and finish.
The gloss coat goes on first because it creates a smooth surface that helps panel liner flow cleanly into recessed lines and makes cleanup much easier. It also gives waterslide decals a surface they can properly adhere to without silvering. Once your panel lines and decals are in place, a final top coat in whatever finish you want - matte, gloss, semi-gloss - seals everything and gives the kit its finished look.
Every step in this sequence has a specific purpose. Skipping the initial gloss coat or rearranging the order will make your panel lining and decal work harder than it needs to be, and the results won't be as clean.
Check out our beginner's guide to panel lining for more detail on that side of the process.
Popular Top Coat Brands for Gunpla
Mr. Hobby (GSI Creos)
The most popular brand among Gunpla builders worldwide. They make two distinct product lines:
- Mr. Top Coat (water-based acrylic) - The gentler option. Less toxic fumes, safer for plastic, easier cleanup. Available in flat, semi-gloss, and gloss. This is the spray can most beginners should start with.
- Mr. Super Clear (lacquer-based) - Harder, more durable finish. Stronger fumes (definitely need ventilation and a mask). Preferred by experienced builders for its toughness and slightly better clarity. Available in the same three finishes.
Browse Mr. Hobby top coats and sprays
Tamiya
Tamiya's clear coat sprays (the TS line) are lacquer-based and produce excellent results. Their Flat Clear (TS-80) and Semi-Gloss Clear (TS-79) are widely used. Tamiya cans tend to have a finer spray pattern than some competitors, which makes them slightly more forgiving for beginners.
Pledge / Future (Floor Finish)
You'll see this mentioned in hobby forums a lot. Pledge Floor Care Finish (formerly known as Future) is an acrylic gloss coat that's mostly used on clear parts - visor pieces, camera eyes, beam saber blades - to give them that sparkling, crystal-clear shine. It's cheap and self-leveling, which makes it great for that specific job. There's a lot more to Pledge/Future than just clear parts, but that's a topic for a future article.
Safety Precautions
Top coat sprays contain solvents that you should not be breathing. This applies to both lacquer and acrylic formulas, though lacquer is worse.
Always spray in a well-ventilated area. Outdoors is ideal. If you're spraying indoors, a proper spray booth with exhaust ventilation is a must - don't just crack a window and call it good. Wear a respirator mask rated for organic vapors, not just a dust mask. Wear gloves if you have sensitive skin.
Store your cans at room temperature, away from heat sources and direct sunlight. Don't spray near open flames.
These aren't suggestions - they're the basics of working safely with hobby chemicals. A good respirator costs about the same as one Master Grade kit and protects your lungs for years.
Top coating is one of those steps that feels intimidating until you actually do it - and then you wonder why you waited so long. A single can of matte top coat and ten minutes of spraying will do more for the look of a kit than almost any other technique at the same effort level. Get the basics right (thin coats, dry weather, proper ventilation), and you'll see the difference immediately. Your shelf of builds will thank you.
Recommended Related Articles
- Beginner's Guide to Nubs - Get your surfaces clean before top coating
- Panel Lining Guide - The step that usually comes right before top coating
- Sanding & Polishing 101 - Surface prep makes or breaks your finish
- Gunpla Grades Explained - Find the right kit for your skill level